


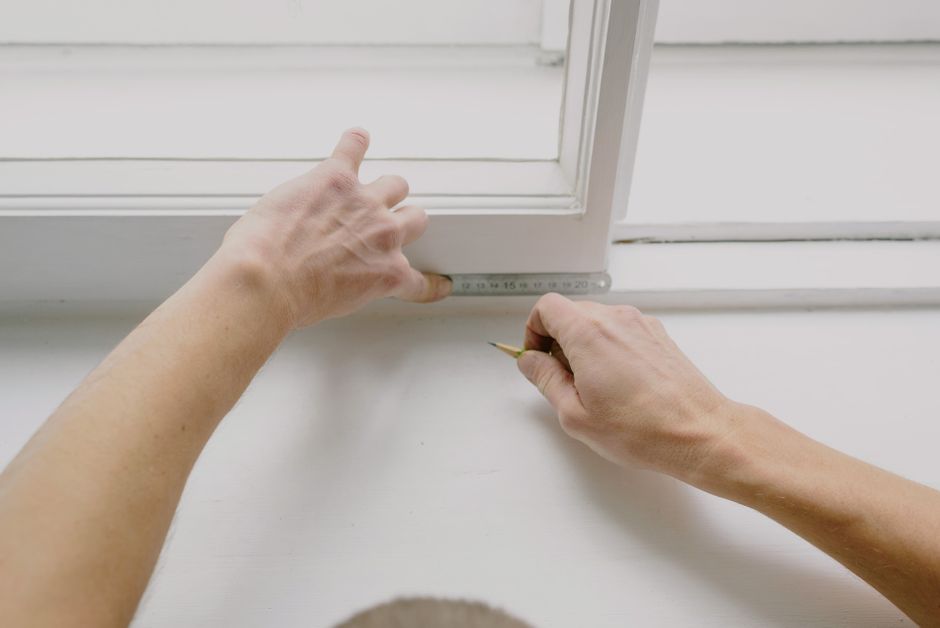
Why Getting Your Aluminum Window Measurements Right the First Time Matters
If you need to know how to measure aluminum windows for replacement, here’s the quick answer:
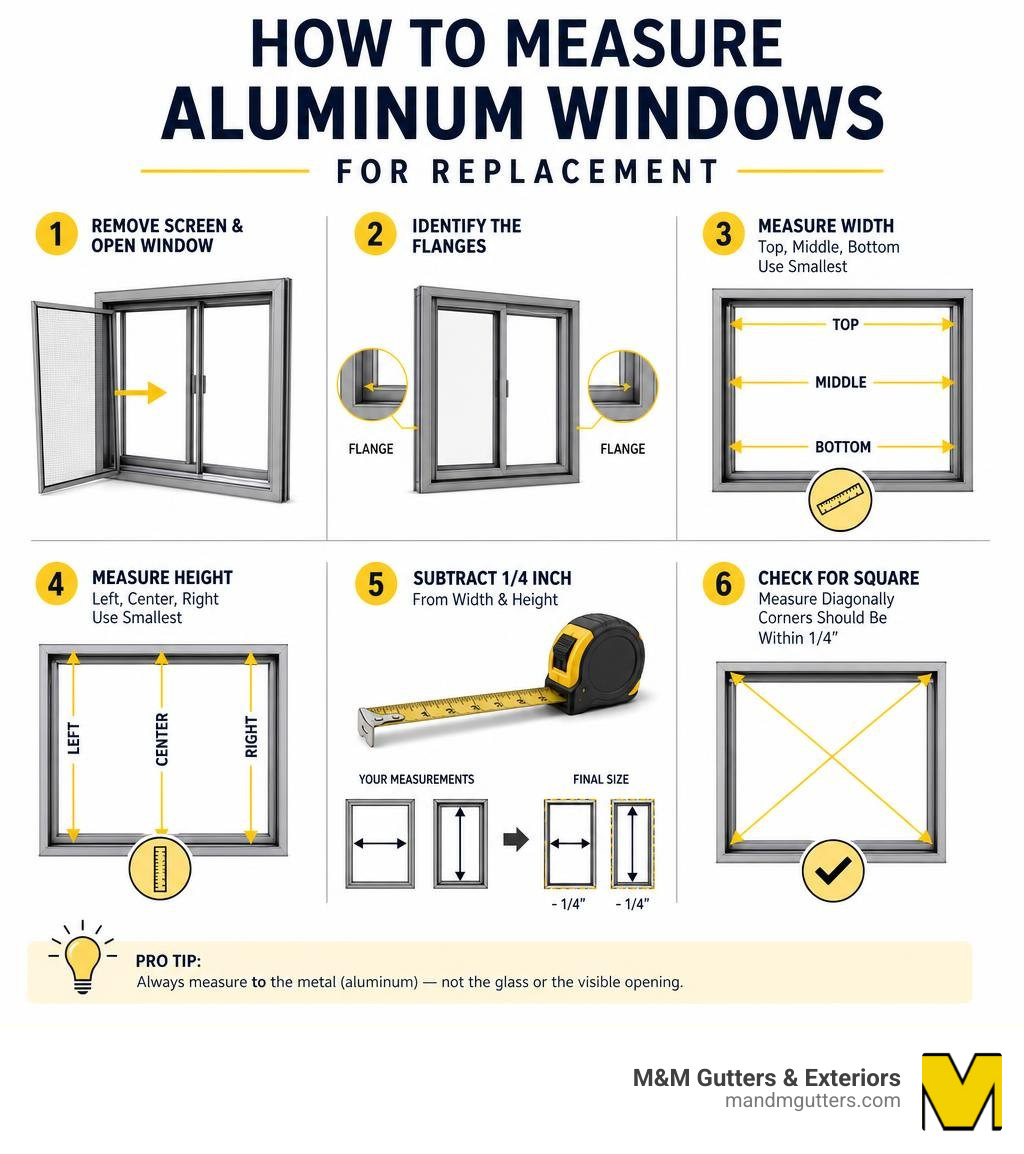
- Remove the screen and open the window fully.
- Identify the flanges — the protruding edges on your aluminum frame.
- Measure the width between matching flanges at the top, middle, and bottom. Use the smallest number.
- Measure the height between matching flanges at the left, center, and right. Use the smallest number.
- Subtract 1/4 inch from each measurement to get your final replacement window size.
- Check for square by measuring diagonally corner to corner — both numbers should be within 1/4 inch of each other.
— Even a half-inch mistake can mean weeks of delays and hundreds of dollars in extra costs. Custom aluminum replacement windows ordered with incorrect measurements result in an average delay of 2-3 weeks and additional costs of $150-$400 per window. And improper measurements account for roughly 25% of all window replacement callbacks and rework — a frustrating and expensive problem that’s almost entirely avoidable.
Aluminum windows have specific quirks that make them different from wood or vinyl frames. The flanges, the frame depth, and the way the frame sits in the wall all affect how you take your measurements. Getting those details right before you order is the difference between a smooth Saturday project and a two-week headache.
I’m Nathan Nuttall from M&M Gutters & Exteriors, and after 30+ years helping Utah homeowners with exterior improvements — including window replacement — I know exactly where things go wrong when people try to figure out how to measure aluminum windows for replacement on their own. This guide will walk you through every step so you get it right the first time.
Simple guide to how to measure aluminum windows for replacement terms:
- how do you measure a replacement window
- how to measure for replacement windows in a brick home
- how to measure house windows for replacement
Preparation and Tools: What You Need Before Measuring
Before you pull out your tape measure and start stretching it across the glass, you need to set yourself up for success. We always tell our clients across Salt Lake County and Davis County that a little preparation saves a massive amount of frustration later.
First, let’s gather your toolkit. You do not need highly specialized, expensive contractor gear to do this, but you do need tools that are reliable and accurate.
- Steel Tape Measure: Leave the fabric sewing tape in the drawer. Fabric or plastic tapes stretch and sag, which can easily throw your measurements off by a quarter-inch or more. A high-quality 25-foot steel tape measure is your best friend here.
- Spirit Level (or Bubble Level): A 24-inch or 48-inch level is crucial for verifying if your existing frame is plumb (perfectly vertical) and level (perfectly horizontal).
- Pencil and Notepad: Never rely on your memory. Write down every single number immediately. We highly recommend sketching a quick diagram of each window and labeling them by room (e.g., “Kitchen Sink,” “Master Bedroom Left”).
- Cleaning Cloth and Putty Knife: Old aluminum windows love to collect dirt, dead bugs, and crumbling exterior caulk in their tracks. Clean these out so your tape measure can sit flat against the actual metal frame.
- Utility Knife: You may need this to gently score paint or caulk lines if you are removing trim to inspect the frame.
- Safety Gear: Work gloves and safety glasses are highly recommended, especially if you are working with older, brittle aluminum frames that might have sharp edges or loose glass.
Once your tools are ready, clean the window tracks thoroughly. Any debris left in the corners can prevent your tape measure from seating properly, leading to an artificially small or large reading.
Understanding the Anatomy of Your Aluminum Window Frame
To measure accurately, you have to know what parts of the window you are actually looking at. Measuring the wrong component is one of the most common ways homeowners end up ordering the wrong size.
- The Head: This is the main horizontal piece that forms the very top of the window frame.
- The Jambs: These are the vertical sides of the window frame. You have a left jamb and a right jamb.
- The Sill: The horizontal piece forming the bottom of the frame. The interior ledge you place plants on is technically called the “stool,” while the actual frame piece at the bottom is the “sill.”
- The Sash: This is the inner frame that holds the glass. When measuring for a complete replacement window, you are measuring the outer frame, not the sash.
- Weep Holes: These are small, rectangular drainage openings at the bottom of your exterior aluminum frame. They allow condensation and rainwater to drain out. Make sure you don’t block these, and don’t include them in your height measurements!
- The Flange: Aluminum windows often feature a nail fin or a flush-fin (often called a dual-wall flush fin) that projects outward. Identifying the furthest protruding flange is the secret to measuring aluminum windows correctly.
Pocket vs. Full-Frame: Choosing Your Replacement Method
Before you can finalize your numbers, you have to decide how you are going to replace the window. The two primary methods are pocket (or insert) replacement and full-frame replacement. Which one you choose dictates exactly where you place your tape measure.
- Pocket (Insert) Replacement: This method is used when your existing window frame is structurally sound, square, and free of moisture damage or rot in the surrounding wall. You leave the existing aluminum frame in place, remove the old sashes, and slide a new replacement window right into the old frame. It is faster, less messy, and preserves your interior and exterior trim.
- Full-Frame Replacement: If your existing frame is badly warped, out of square, or if there is water damage and rot in the wood studs surrounding the window, you must choose a full-frame replacement. This involves removing everything—including the old frame, interior trim, and exterior casing—down to the raw wood studs (the “rough opening”).
If you’re unsure which route is best for your home’s current condition, check out our comprehensive How to Measure for Replacement Windows Guide to help you evaluate your options.
How to Measure Aluminum Windows for Replacement using the Pocket Method
If your existing frames are in great shape, pocket installation is a fantastic, cost-effective option. In fact, using flush-fin replacement windows—which are incredibly popular throughout Utah and the West—can reduce installation time by 30% to 50% compared to full-frame replacements because you don’t have to disturb the exterior stucco or siding.
To measure for a pocket installation:
- Open the window fully and remove the screen.
- Locate the innermost jamb faces. For aluminum windows, you want to measure between the furthest protruding metal flanges on the left and right sides.
- Measure the width in three places: the top, the middle, and the bottom of the frame.
- Measure the height from the highest point of the sill to the lowest point of the head jamb in three places: left, center, and right.
- Record the smallest of these measurements. To ensure the new insert slides in smoothly without binding, subtract 1/4 inch from both the final width and height.
For a deeper dive into this process, you can refer to this technical guide on How To Measure Aluminum Windows for Replacement? which details flange-to-flange measurements.
Measuring for Full-Frame Replacement and the Rough Opening
If your home has settled significantly, or if you are upgrading from old aluminum to vinyl windows and want to maximize your glass area, full-frame replacement is the way to go.
For a full-frame install, you need to measure the rough opening (RO)—the opening formed by the structural wood studs.
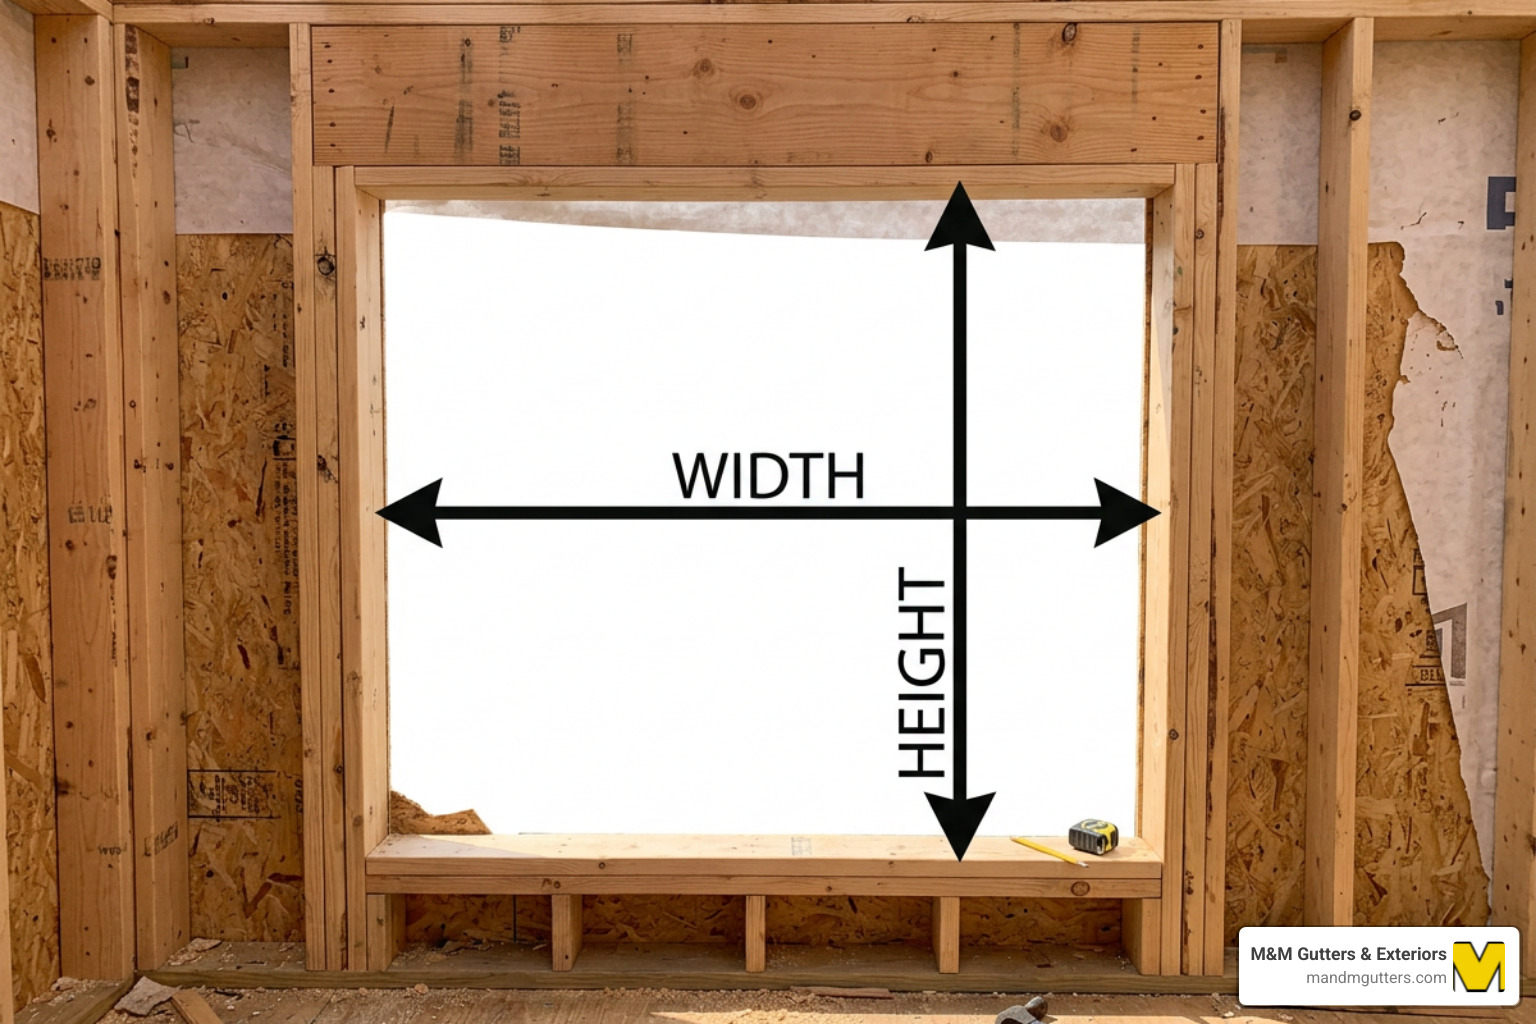
To get these measurements:
- Remove the interior trim (casing) using a pry bar to expose the wooden studs surrounding the window.
- Measure the width between the actual wood studs on the left and right in three places (top, middle, bottom).
- Measure the height from the bottom sill plate to the top header stud in three places (left, middle, right).
- Record the smallest measurements.
Warning: Measuring the rough opening incorrectly is a major pitfall. In fact, measuring the rough opening instead of the existing frame (or vice versa) can lead to ordering windows that are 1/4 to 1/2 inch too large in 60% of aluminum-to-vinyl replacement projects. To prevent this, always subtract 1/2 inch from your smallest rough opening width and height measurements. This provides a 1/4-inch clearance on all sides for shimming, leveling, and insulating the new window.
For more tips on avoiding these common framing mistakes, read our article How to Measure Windows for Replacement: Get It Right the First Time.
Step-by-Step Guide: How to Measure Aluminum Windows for Replacement
Now that you understand the concepts, let’s look at the exact physical process of taking your measurements.
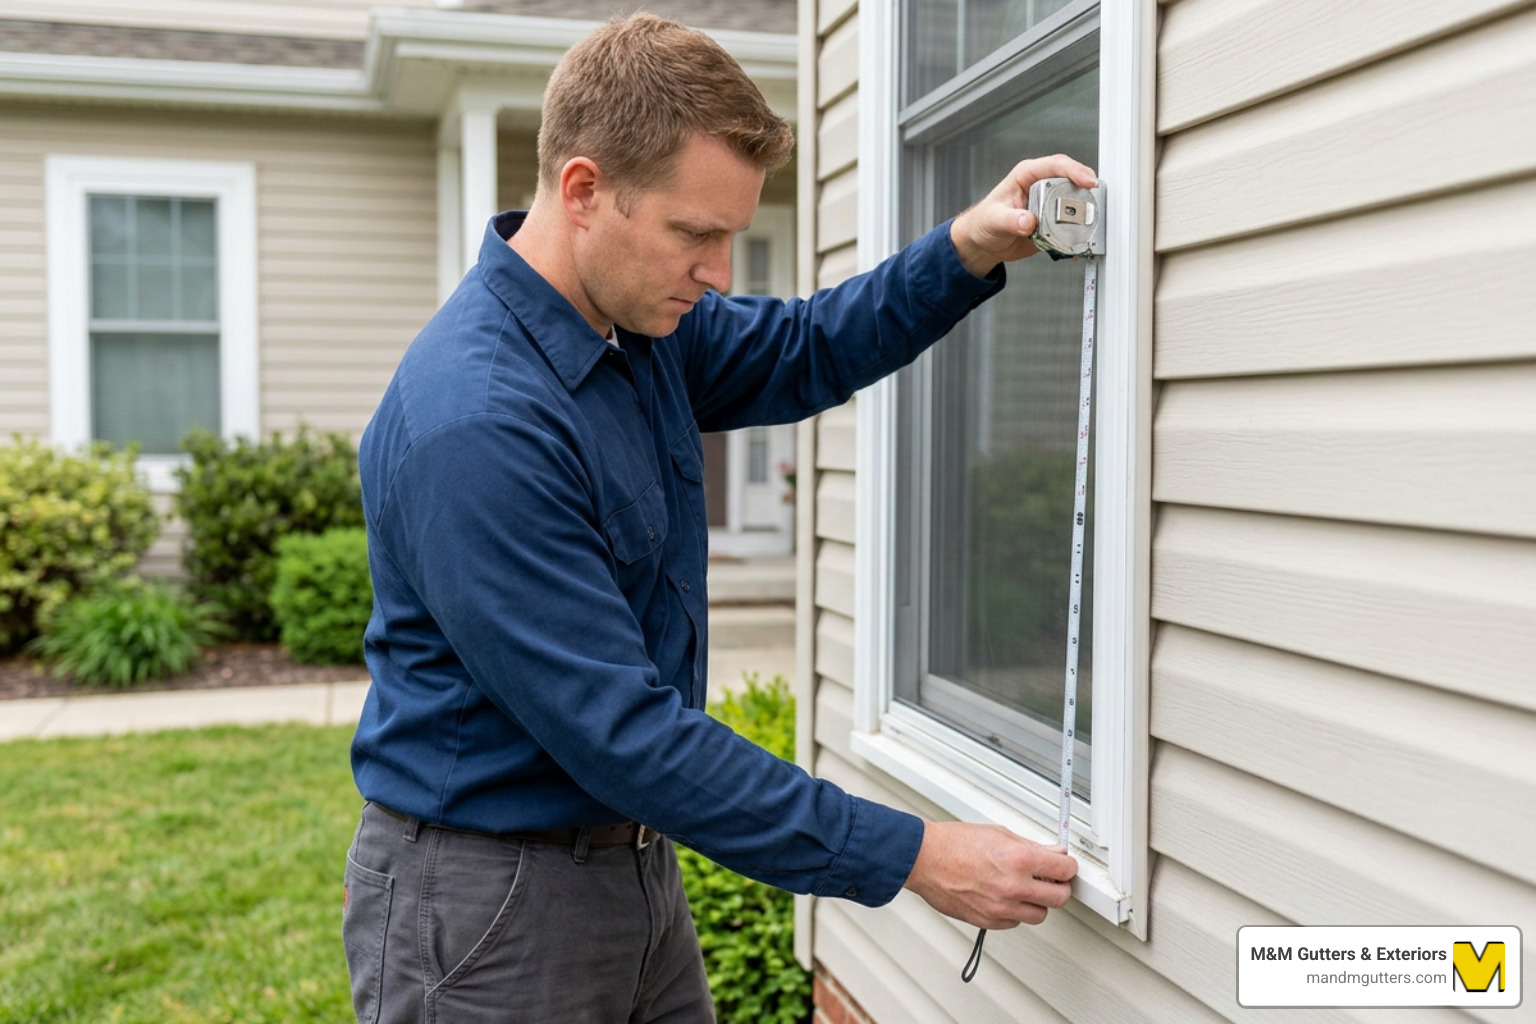
To keep your notes organized, we recommend using a simple table like the one below to log your numbers:
| Measurement Type | Left / Top Point | Center / Middle Point | Right / Bottom Point | Smallest Value | Final Ordered Size (Smallest – 1/4″) |
|---|---|---|---|---|---|
| Width | (Top) _____ in | (Middle) _____ in | (Bottom) _____ in | _____ in | _____ in |
| Height | (Left) _____ in | (Center) _____ in | (Right) _____ in | _____ in | _____ in |
| Depth | (Min. 3 1/4″ needed) | Depth: _____ in | N/A for most pocket installs |
Measuring Width and Height Accurately
The absolute golden rule of window replacement is: Measure in three locations and use the smallest measurement.
Why? Because houses settle, wood warps, and aluminum can bow over time. If you only measure the width at the bottom, but the middle of the frame has bowed inward by a quarter of an inch, your new window will not fit. Homeowners who measure windows in three locations (top, middle, bottom) and use the smallest measurement reduce their installation errors by up to 40%.
When recording your dimensions, always write them down in the industry-standard format: Width x Height (W x H). If you accidentally reverse these when ordering, you will end up with a window that is rotated 90 degrees!
Always round your measurements down to the nearest 1/8 inch. If your tape measure reads 35 and 15/16 inches, round it down to 35 and 7/8 inches. It is much easier to fill a slightly larger gap with insulation and caulk than it is to grind away brick or shave down wood studs because a window is 1/16 of an inch too wide.
For a detailed walkthrough on why rounding down is your safety net, see Measure Twice, Order Once: Your Guide to Perfect Replacement Window Sizing.
Checking for Square, Level, and Plumb
A window opening can be the exact right width and height but still be completely unusable if it is shaped like a parallelogram instead of a perfect rectangle.
To check if your window opening is square:
- Extend your tape measure diagonally from the top-left corner to the bottom-right corner. Write down the number.
- Measure from the top-right corner to the bottom-left corner. Write down the number.
- Compare the two numbers.
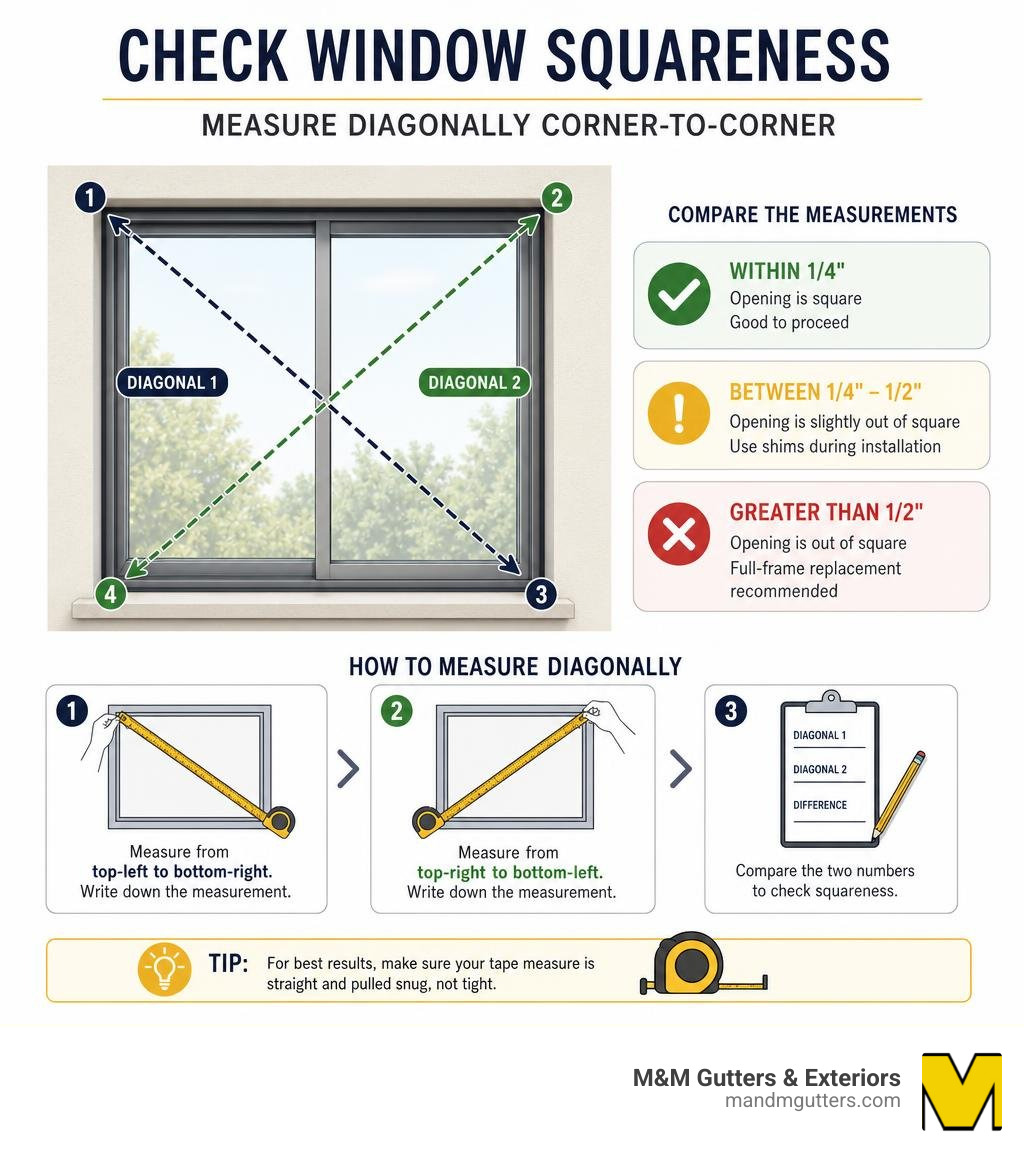
If the diagonal measurements are within 1/4 inch of each other, your opening is square enough for a standard replacement window. If the difference is between 1/4 inch and 1/2 inch, you will need to use shims during installation to make the new window sit straight. If the difference is greater than 1/2 inch, your opening is significantly out of square. In this scenario, a simple pocket installation won’t work; you will need to perform a full-frame replacement so you can rebuild and square up the rough opening.
Next, place your level horizontally on the sill to check for level, and vertically against both side jambs to check for plumb. If the bubble isn’t perfectly centered, make a note of it. You will need to account for this slope when shimming the new window.
Special Considerations: Window Styles, Home Types, and Climate
Living in Northern Utah means our homes have to withstand extreme weather. From freezing winters in Park City (Summit County) to scorching summer days in Tooele and Salt Lake City, thermal expansion is a major factor. Aluminum expands and contracts with temperature swings much more than wood. When measuring, we must ensure there is adequate perimeter clearance (typically 1/4 inch) to allow for this movement without buckling the frame.
Measuring Special Window Styles: Sliding, Casement, and Multi-Panel
Different window styles have unique structural elements that alter how you measure them:
- Sliding Aluminum Windows: These are incredibly common in Utah homes built between the 1960s and 1990s. When measuring sliding windows, pay close attention to the center meeting rail (where the two sashes overlap). Ensure your depth measurement is taken at a point that clears this track.
- Casement Windows: Because casement windows crank outward, the frame must be absolutely plumb and square, or the sash will bind when opening. Double-check your diagonal measurements.
- Multi-Panel Windows: If you have a large multi-panel window unit (such as a three-lite slider), measure the entire unit’s outer frame width first. Then, measure each individual panel from the center of the mullion (the vertical bar separating the panels) to the outer frame edge. This ensures your replacement window matches the original sightlines of your home.
If you are thinking about upgrading to vinyl instead of replacing with aluminum, read our guide on Get the Perfect Fit: How to Measure Vinyl Replacement Windows to understand the structural differences.
How to Measure Aluminum Windows for Replacement in Brick or Older Homes
Utah is home to beautiful historic brick bungalows and older properties with plaster walls. Measuring windows in these homes requires an extra layer of care.
In a brick-front home, the exterior brick does not shrink or expand, and it cannot be easily trimmed. You must measure the opening between the brick mold or masonry on the outside, in addition to your interior measurements. The replacement window must be small enough to clear the exterior brick opening while still resting securely against the interior framing.
Furthermore, older homes settle over decades, meaning “square” is often more of a polite suggestion than a reality. If you are dealing with a brick exterior, check out our highly specific guide, Don’t Get Bricked Up: How to Accurately Measure Windows in a Brick House, to avoid getting stuck with a window that won’t fit the masonry.
Frequently Asked Questions about Measuring Aluminum Windows
What happens if my window opening is not square?
If your diagonal measurements differ by more than 1/4 inch but less than 1/2 inch, the opening is slightly out of square. You can still install a replacement window by ordering it based on the smallest width and height measurements. During installation, you will use wooden or plastic shims behind the screws to adjust the window until it sits perfectly level and plumb within the crooked opening.
However, if the opening is out of square by more than 1/2 inch, the new window’s sash will likely bind, leak air, or fail to lock properly. In this case, you must perform a full-frame replacement to rebuild the framing.
Should I measure the glass or the frame when replacing windows?
Always measure the frame, never just the glass.
Measuring only the visible glass (or the sash) and ordering a window based on those numbers is a recipe for disaster. The replacement window must fit the structural opening of the wall. Your measurements must run from the inside face of the left jamb to the inside face of the right jamb, and from the sill to the head. The glass size is determined automatically by the manufacturer based on the overall frame dimensions you provide.
What is the difference between measuring for aluminum and vinyl windows?
Aluminum frames generally have much thinner profiles than vinyl frames. Because vinyl is thicker and less rigid than aluminum, a vinyl replacement window will have wider frames and slightly less glass area than your original aluminum window.
Additionally, aluminum windows often rely on exterior flush-fins that sit flat against stucco or siding. When measuring for an aluminum-to-vinyl transition, you must be extremely precise about your depth measurements. Standard replacement windows require a minimum jamb depth of 3 1/4 inches. If your old aluminum frame is shallower than this (which is common in older homes or modular builds), a standard vinyl window will protrude past your interior drywall unless you install custom jamb extensions.
Conclusion
Measuring your aluminum windows for replacement is a project that rewards patience, precision, and double-checking your work. By taking three measurements for both width and height, checking your diagonals for squareness, and choosing the right replacement method, you can confidently order windows that fit like a glove.
But let’s be honest: standing on a ladder trying to hold a metal tape measure straight while calculating fractions of an inch can be stressful. If you make a mistake, you’re stuck with an expensive piece of custom glass that doesn’t fit your wall.
That is where we come in. At M&M Gutters & Exteriors, we have over 30 years of experience serving homeowners throughout Salt Lake County, Utah County, Summit County, and Northern Utah. We take the guesswork out of the equation. Using advanced HOVER 3D visualization technology, we can create an exact, millimeter-precise model of your home’s exterior to plan your window replacement perfectly.
Save yourself the headache and let our licensed professionals handle the measuring, ordering, and installation. Contact us today to schedule your consultation, and explore our professional Window Replacement Services to get started on upgrading your home’s comfort, energy efficiency, and curb appeal!